As I finished up my U.S. map puzzle, I got started on my second project, a drop-leaf Lego table. I’d seen tables before with baseplates as the surface, but I wanted something bigger than this IKEA hack and smaller than this dining room table extravaganza. I wanted it to have some Lego storage underneath, and I thought adding drop-leaves would give it more room without taking up any more space.
I figured two by three baseplates, or 20 x 30 inches, was a good size for the main table, and I got a sheet of half-inch pine that was 24″ wide, giving a nice little border around the sides. I cut the leaves to 12″ wide, to accommodate one 10″ plate and two inches of border to match the main surface.
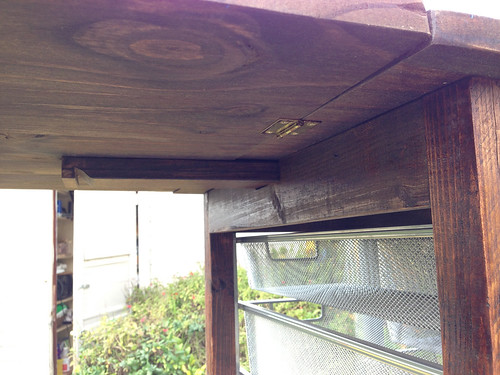
I used some tips from this site to figure out how to attach the surface and side pieces to the legs. I picked up a handy pocket hole jig for making the holes needed to attach the pieces to one another (a tool that is definitely going to come in handy in the future), and I set out figuring out how long to make each of the pieces.
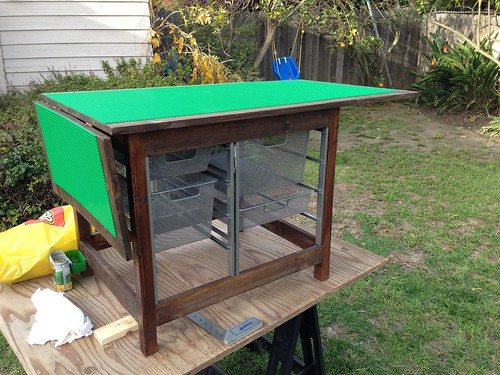
Meanwhile, I went to the Container Store to look for storage bins, and I came away with two widths of Elfa racks and drawers. Together, they added up to about 24 inches wide and 20 inches deep, so I figured they’d fit underneath my 30″ by 24″ table top. When I got home, I only had to make a few adjustments to one dimension of my trim; otherwise, they fit perfectly underneath.
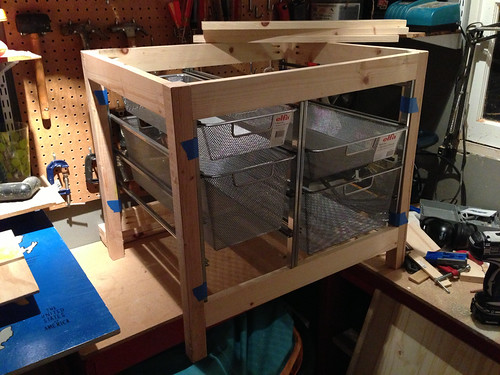
The only challenge I was faced with was how to get the inner bracket supports to stay in place, and I ended up inserting a short dowel down from the top and up from the bottom trim pieces and sliding the rack onto each dowel. They’re not going anywhere now.
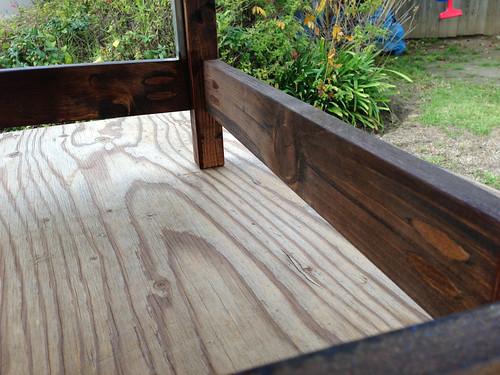
I covered up each of the pocket holes with a little plug, and then sanded and stained the whole thing. It’s not perfect, but it’s funny how much nicer a thing looks when you take a little more time to finish it.
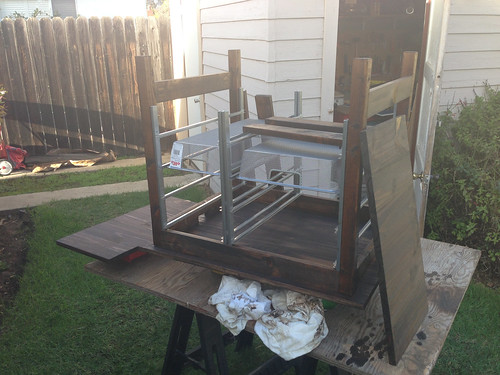
Finally, I cut a slot in the end trim with my jigsaw to accommodate a short drop-leaf support that would slide out and keep the leaf up. I put a dowel in the support so it wouldn’t slide all the way out, but that didn’t keep the support from sliding too far in and hitting the other support or falling out. So, I then built a needlessly complex little box on the underside of the table top to keep the two drop-leaf supports from going too far back, and put a groove in it for the dowel to slide into to keep the support in line.
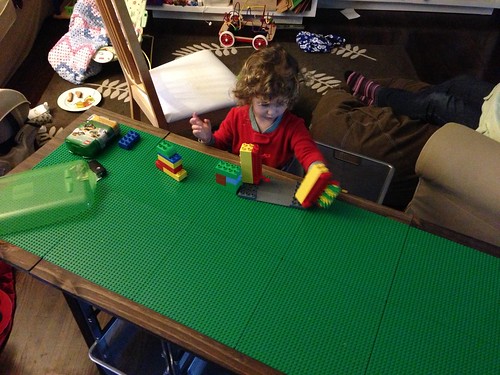
The last step was to find seven more base plates (I finally had to go to the source, the Lego Store in Glendale, two days before Christmas, which was poor timing…) and attach all ten to the top and leaves. You can’t just place one plate right up next to another; in order to make it so one brick can span two plates, a slight gap needs to be left between each plate, which you can create by placing a brick over each border.
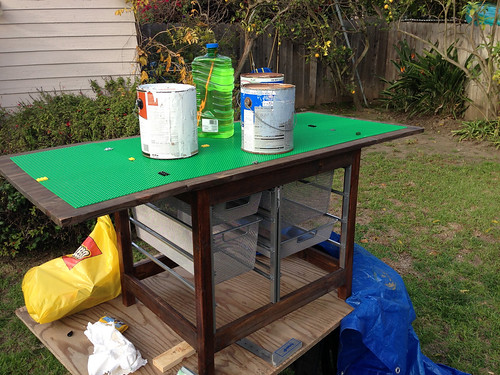
I accidentally left the table out in a bit of unexpected rain the night before, so as imperfect as it was to begin with, it got a little more thanks to some warping, but the plates on the top and those on the leaves meet up pretty nicely, and could accommodate a big, sprawling Lego creation across all 10 plates.
The final test, of course, is in real-world use, and Grace has so far been very excited about it. It now has a place in her room (mostly because it was too wide to fit through the door to the office, where I’d planned on leaving it) and she’s always building towers, streets, houses, cars, and car washes. See the full set of photos here.